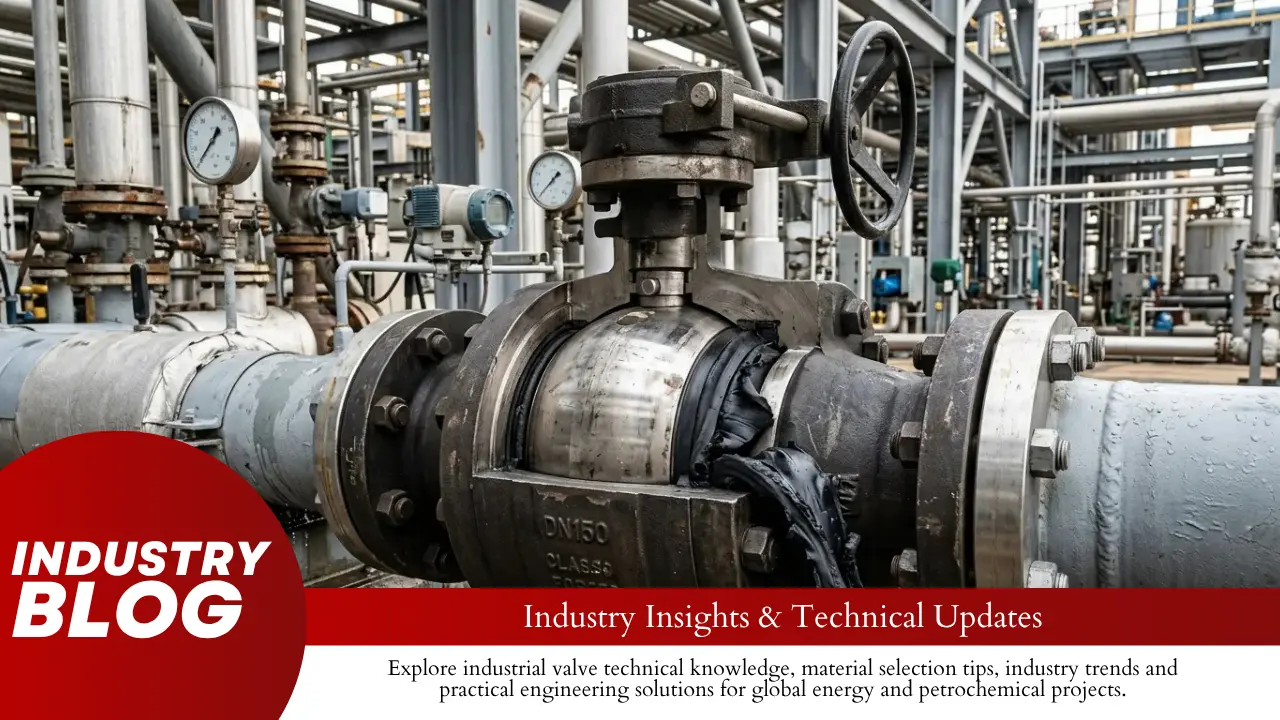
A control-system Closed signal only shows that a switch or position sensor has changed state. It does not prove that the ball is fully seated. Actuator travel error and seat damage can also happen together. A ball that stops slightly early leaves a narrow opening that can erode the seat. A swollen, dirty, or damaged seat can also raise torque and prevent the actuator from completing its travel.
About the data in this article: numerical examples such as pressure, time, current, angle, and leakage rate show how field records can be interpreted. They are not universal acceptance limits. The correct limit must come from the valve datasheet, actuator manual, project specification, and applicable test standard.
Safety: do not loosen the actuator, coupling, packing, body bolts, drain plug, vent plug, or pipe connection while pressure or stored actuator energy may remain. Isolate every energy source, lock it out, depressurize the system, control spring energy, drain or purge the fluid, and verify isolation before work starts. OSHA requires stored or residual energy to be relieved, disconnected, restrained, or otherwise made safe before servicing.[1]
Fast Diagnosis
| Finding | Most useful next check |
|---|---|
| Downstream pressure stays stable | Trapped pressure, temperature change, or instrument response |
| Downstream pressure continues rising | Seat leakage, bypass flow, reverse flow, or another open connection |
| A small approved travel correction reduces leakage | Limit switch, stop setting, coupling, calibration, debris, or worn seat |
| The valve closes without pressure but stops early under pressure | Insufficient actuator output or excessive valve torque |
| The actuator moves farther than the valve stem | Coupling slip, worn adaptor, damaged key, spline, or internal drive |
| The stem reaches the correct position but leakage remains | Seat, ball, seat spring, rear seal, or seat-loading problem |
| Leakage changes when pressure direction is reversed | Directional seat design or damage to one seat |
| The problem started after welding, flushing, or startup | Rust, weld slag, scale, sand, or construction debris |
These findings are clues, not final proof. Do not increase actuator torque simply to force the valve closed. Extra torque may reduce leakage for a short time while cutting a soft seat, twisting the stem, damaging the coupling, or chipping a hard coating.
Confirm the Leak
Before removing the valve, identify what type of leakage is present:
- Through-seat leakage: fluid passes between the ball and seat into the opposite side of the pipeline.
- External leakage: fluid escapes through the stem packing, body joint, flange, vent, drain, or pressure-containing wall.
- Cavity discharge: fluid already trapped inside the valve body leaves through a drain or bleed connection.
- Cross-flow: fluid reaches the downstream pipe through a bypass, check valve, common header, or connected machine.
ISO 15848-1 covers external leakage from valve stem seals and body joints. It does not set the through-seat leakage limit for a closed ball valve.[2] For external and internal leakage differences, see how to troubleshoot a leaking ball valve in the field.
Record upstream pressure, downstream pressure, fluid temperature, valve position, pump status, and time after closure. One pressure reading is not enough.
- Stable downstream pressure: pressure may simply be trapped.
- Pressure rising toward upstream pressure: new fluid is entering the downstream section.
- Pressure rising with temperature: trapped liquid may be expanding.
- Pressure changing when another valve moves: a bypass, common header, or connected unit may be involved.
Illustrative pressure trend:
| Time After Closure | Upstream Pressure | Downstream Pressure | Fluid Temperature |
|---|---|---|---|
| 0 minutes | 10.0 bar | 0.3 bar | 24°C |
| 5 minutes | 10.0 bar | 0.9 bar | 24°C |
| 15 minutes | 9.9 bar | 2.1 bar | 25°C |
| 30 minutes | 9.9 bar | 3.4 bar | 25°C |
This example shows that fluid is entering the downstream section. It does not show the exact leakage rate because the downstream volume, fluid compressibility, pipe expansion, and connected equipment are not known.
Do not judge leakage size only from the speed of pressure rise. The same leak can produce a fast pressure rise in a small closed volume and a slow rise in a large pipe or vessel.
Walk the actual piping and check manual bypasses, automatic recirculation lines, check valves, warm-up lines, drains, vents, instrument tubing, flushing lines, temporary hoses, parallel equipment, and three-way valves. Change one condition at a time. If closing another valve stops the flow, another path is involved, but the original valve may still require a separate seat test.
Also check the flowmeter. Zero offset, electrical noise, vibration, gas bubbles, a partly filled pipe, density compensation, blocked impulse lines, or operation below the meter’s reliable range can create a false low-flow reading. Compare the signal with downstream pressure, tank level, collected liquid, pipe temperature, or another calibrated instrument.
Identify the Valve
Record the valve model, size, pressure class, seat material, pressure direction, actuator model, and fail action before testing. The diagnosis changes with the valve design.
- Floating ball: pressure moves the ball slightly toward the downstream seat. Many soft-seat designs also use initial seat preload for low-pressure sealing.
- Trunnion-mounted ball: upper and lower supports hold the ball while movable seat rings press against it.
- Soft seat: provides tight shutoff but can be cut, extruded, swollen, softened, or permanently deformed.
- Metal seat: suits many hot or abrasive services but can suffer scoring, galling, coating loss, corrosion, or erosion.
- Control ball valve: may have a specified allowable shutoff class rather than an isolation-valve zero-leakage requirement.
A typical soft-seated trunnion ball valve may use self-relieving SPE seats, DPE seats, or a mixed arrangement. These configurations do not react to cavity and line pressure in the same way.
ISO 14313:2025 covers the design, manufacture, materials, assembly, testing, documentation, and process control of covered pipeline valves. It supplements API 6D, 25th edition, for its stated scope.[3] The actual seat action must still be confirmed from the valve drawing and purchase specification.
Check Actual Travel
Compare five separate points:
- DCS or PLC status
- Actuator limit-switch status
- Local position indicator
- Valve-stem position
- Actual ball position
Watch a complete closing stroke. Check whether the DCS shows Closed before the actuator stops, whether the limit switch changes before the stem reaches its endpoint, and whether the actuator output moves without equal stem movement.
Where the stem has a line, flat, slot, or key showing ball orientation, compare it with the valve drawing. Do not assume the mark is a precision calibration device or that every ball valve must seal at an exact visible 90-degree position.
Repeat the stroke several times under the same conditions. Three strokes are normally enough for an initial repeatability check, but they do not replace the manufacturer’s acceptance procedure.
Illustrative stroke record:
| Closing Stroke | Closing Time | Final Stem Position | Closed Signal |
|---|---|---|---|
| Stroke 1 | 7.8 seconds | Documented endpoint | At endpoint |
| Stroke 2 | 7.9 seconds | Documented endpoint | At endpoint |
| Stroke 3 | 12.4 seconds | About 4° early | Closed before movement stopped |
The changing time and endpoint in this example point toward sticking, coupling slip, unstable actuator output, or moving debris. A fixed stop or fixed calibration error would normally produce a more repeatable wrong endpoint.
- The same wrong endpoint every time: check the stop, limit switch, positioner calibration, or a fixed obstruction.
- A different endpoint each time: check coupling slip, backlash, gearbox wear, unstable positioner output, or moving debris.
- Correct travel without pressure but short travel under pressure: check actuator output and valve torque.
- Correct travel with continued leakage: inspect the sealing system.
Place witness marks across the actuator, bracket, coupling, adaptor, and stem. Movement between the marks can reveal loose bolts, rounded drives, worn keys, cracked adaptors, incomplete engagement, or bracket movement.
ISO 5211:2026 specifies attachment dimensions, drive-component dimensions, and reference interface torque values for part-turn actuators and industrial valves.[4] A correct ISO 5211 mounting flange does not prove that the coupling is unworn, aligned, or fully engaged.
Internal drive damage is also possible. The visible stem may turn while a worn stem-to-ball drive, broken key, cracked ball slot, or twisted stem prevents equal ball movement.
Check the Stops
An incorrect stop setting may follow actuator replacement, gearbox repair, bracket replacement, coupling work, valve replacement, or positioner calibration.
Do not start by loosening the stop and adding travel. First find the correct valve endpoint in the valve manufacturer’s instructions. Then check the relationship between:
- Mechanical stops
- Electrical limit switches
- Electronic position limits
- Torque switches
- Motor shutoff logic
Many automated quarter-turn valves use position limits for normal closure and torque protection for overload. The exact method depends on the valve and actuator. Increasing the torque-switch setting does not correct an incorrect closing angle.
For a positioner or smart actuator, check zero, span, feedback linkage, travel calibration, tight-shutoff settings, travel cutoff, deadband, fail action, output pressure, and position-deviation alarms. A displayed 0% may show actuator position rather than actual ball position.
Test the Actuator
An actuator can have correct travel settings but still fail to reach the endpoint under operating pressure.
Pneumatic Actuators
Measure air pressure at the actuator while it moves. Static pressure at the main air header is not enough.
| Area | Checks |
|---|---|
| Supply | Header pressure, regulator setting, shared demand, water, and ice |
| Inlet flow | Filter, solenoid, tubing size, long tubing, crushed tube, and fittings |
| Exhaust | Blocked muffler, restricted speed control, and exhaust backpressure |
| Actuator | Piston seals, bearings, corrosion, springs, and internal friction |
Illustrative pneumatic test:
| Operating Point | Measured Pressure |
|---|---|
| Valve stationary | 6.0 bar |
| Middle of closing stroke | 5.5 bar |
| Near closed position | 4.6 bar |
| After movement stops | 5.9 bar |
The 1.4 bar drop between the stationary and final-closing readings shows that the actuator receives less pressure while torque demand is high. It does not by itself prove that the actuator is undersized. Check the regulator flow capacity, filter, solenoid valve, tubing, exhaust restriction, and original actuator-sizing pressure.
A blocked exhaust can prevent closure even when inlet pressure appears normal. For a double-acting actuator, check both chambers. For a spring-return actuator, compare the available spring torque with the valve torque at the required fail position.
Do not open a spring-return actuator without the manufacturer’s procedure. The springs can retain dangerous energy after the air supply is removed.
Electric Actuators
Review the event log and the order in which protection devices operate.
- Limit switch operates first: the travel endpoint may be wrong.
- Torque switch operates first: valve resistance may be high or the setting may be too low.
- Motor overload operates: check power quality and mechanical resistance.
- No alarm but the stem stops early: inspect the coupling, gearbox, and feedback system.
Illustrative trend:
| Recorded Item | After Commissioning | Current Test | Change |
|---|---|---|---|
| Closing time | 8.0 seconds | 10.6 seconds | 32.5% longer |
| Peak motor current | 2.2 A | 3.0 A | 36.4% higher |
| Final stem position | Documented endpoint | 2° early | Incomplete travel |
The longer stroke time, higher current, and early endpoint show that mechanical resistance has increased. Check deposits, seat swelling, bearings, pipe load, and alignment before increasing the torque setting.
Measure voltage while the motor runs. Normal voltage with the motor stopped does not rule out a voltage drop under load. Do not raise the torque setting before checking valve torque, stem strength, gearbox rating, coupling rating, and seat condition.
Hydraulic Actuators
Check supply pressure, return pressure, pump output, relief settings, oil temperature, filters, hoses, cylinder leakage, piston seals, control valves, and accumulator condition.
High return pressure reduces the usable pressure difference across the piston. Cold oil may increase resistance, while hot oil may increase internal leakage. An accumulator may start the stroke normally but run out of usable pressure or oil volume before the valve reaches the endpoint.
Compare Valve Torque
Valve torque is not one fixed number. Keep these values separate:
- Breakaway torque: torque needed to start movement from rest.
- Running torque: torque needed while the ball is moving.
- Ending or reseating torque: torque needed near the final position.
Torque can rise because of differential pressure, seat swelling, deposits, dry gas, high viscosity, abrasive solids, tight packing, damaged bearings, corrosion, thermal movement, body distortion, or long periods without operation. See why a ball valve becomes hard to operate after months in service.
Compare the valve’s corrected torque requirement with the actuator output at the same stroke position and at the lowest credible air, hydraulic, or electrical supply condition. Do not compare only maximum actuator torque with average valve torque.
ASME B16.34 covers pressure-temperature ratings, dimensions, tolerances, materials, examination, testing, and marking for covered valves. It does not provide one universal actuator-sizing factor for every ball valve and service.[5]
Actuator sizing must also stay below the maximum torque allowed by the valve stem and drive parts. For further checks, see ball valve actuator safety-factor selection and how to calculate ball valve MAST.
Inspect pipe alignment if the valve became hard to operate after installation. Forced flange alignment, weak supports, thermal pipe movement, heavy unsupported actuators, welding distortion, and foundation movement can distort the valve body and change ball-to-seat contact.
Inspect the Seats
After correct ball travel and sufficient actuator output have been confirmed, inspect the complete sealing system:
- Ball
- Seat inserts and seat rings
- Seat springs
- Rear O-rings or lip seals
- Seat carriers and retainers
- Bearings and ball supports
- Body seals
A seat face can look acceptable while fluid passes around a damaged rear seal or through a seat ring that cannot move freely.
Debris Damage
Rust, weld slag, sand, scale, catalyst particles, metal chips, gasket pieces, crystals, and coating fragments can become trapped between the ball and seat.
Debris is likely when the fault started after installation, welding, flushing, or maintenance; closing torque increased suddenly; movement feels rough; or matching scratches appear on the ball and seat.
Do not repeatedly slam the valve closed. A hard particle may cut a longer path across the seat and ball. Controlled flushing can remove loose material where the process allows it, but flushing cannot repair a cut seat or damaged coating.
Soft Seats
| Damage | Possible Cause |
|---|---|
| Narrow cut | Hard particle |
| Torn edge | Debris, over-travel, or poor assembly |
| Extruded lip | Pressure, heat, excessive clearance, or creep |
| Flattened sealing band | Long-term compression or permanent deformation |
| Swollen seat | Chemical incompatibility |
| Brittle or cracked surface | Heat, aging, or chemical attack |
| Uneven contact | Misalignment, pipe load, or body distortion |
Check the normal process fluid and every cleaning, flushing, startup, and shutdown fluid. A seat may be compatible with the main product but damaged by steam cleaning, a solvent, or an upset temperature.
If the valve is intended for clean service and tight shutoff, review the construction of a forged soft-seated floating ball valve.
Metal Seats
Inspect metal seats and the ball for radial scratches, circular scoring, pitting, galling, coating loss, embedded particles, corrosion, cracking, and erosion near the bore.
A radial scratch crosses the sealing band and can form a direct leak path. A narrow eroded area near the bore may indicate that the valve remained slightly open under pressure.
Check that each seat ring moves freely. Deposits, broken springs, swollen rear seals, corrosion, a damaged seat pocket, or body distortion can prevent the seat from contacting the ball.
Do not grind or lap a metal seat unless the manufacturer approves the procedure. Some valves use matched ball-and-seat sets. Removing material may change the sealing geometry.
For abrasive, high-temperature, or deposit-forming service, compare the application with a forged metal-seated ball valve.
Check Seat Direction
Confirm the flow arrow, high-pressure-end marking, seat drawing, self-relieving direction, and cavity-pressure arrangement.
A valve that leaks in one direction may have:
- One damaged seat
- A preferred sealing direction
- Incorrect installation
- A failed rear seat seal
- Damaged seat springs
- An incorrect cavity or test arrangement
Do not assume that both directions must produce the same result unless bidirectional sealing is required by the valve specification. See what one-direction ball valve leakage means.
A fire-safe backup seal is not proof that a damaged soft-seated valve will retain its normal shutoff performance. ISO 10497:2022 defines fire type-testing requirements for covered soft- and metal-seated isolation valves under specified fire conditions.[6]
Check Cavity Pressure
A closed ball valve can trap liquid inside the body cavity. Pressure may rise because the liquid warms, one seat leaks into the cavity, the fluid vaporizes, or a relief route is blocked.
Possible cavity-pressure controls include:
- Self-relieving seats
- A vented ball
- A body-mounted relief valve
- An external thermal-relief line
- A mixed SPE and DPE seat arrangement
For more detail, read why pressure builds inside a closed ball valve.
Do not loosen a plain vent or drain plug under pressure. A cavity test should use a pressure-rated connection designed for that purpose and an approved procedure defining the pressure source, pressurized side, discharge route, personal protection, seat function, and acceptance limit.
Illustrative cavity-bleed result:
| Observation | Possible Meaning |
|---|---|
| About 80 mL released, then flow stops within 30 seconds | The discharge may only be fluid that was already trapped in the cavity |
| Flow continues at about 20 mL/min after 5 minutes | Fluid is still entering the cavity; check the seat test arrangement and pressure direction |
| Cavity pressure returns after bleeding | One seat may be leaking into the cavity, or trapped liquid may be heating |
The example does not define a universal failure limit. The correct conclusion depends on cavity volume, test pressure, fluid, seat design, and temperature stability.
SPE and DPE describe how individual seats react to pressure. DBB and DIB describe the isolation function of the complete valve. A cavity drain alone does not prove that the valve provides a particular DBB or DIB function.
Run a Leakage Test
A valid test must define:
- Test medium
- Upstream and downstream pressure
- Pressure direction
- Temperature
- Stabilization time
- Test duration
- Cavity condition
- Measurement method
- Instrument range and accuracy
- Acceptance limit
A factory test, repair-shop test, and field test do not automatically use the same conditions or acceptance criteria.
If the valve is a V-port, segmented, or other control ball valve, check its specified shutoff class before treating every measurable flow as a failure. IEC 60534-4:2021 covers inspection and routine testing of covered industrial-process control valves.[7]
ISO 5208:2015 specifies examinations and tests used by valve manufacturers to verify the pressure boundary, closure tightness, and structural adequacy of the closure mechanism. It is intended to be used with the applicable valve product standard.[8]
API’s current update page lists API Specification 6D, 25th edition, Addendum 3, dated March 2025. Use the edition and acceptance requirements stated in the purchase order, valve datasheet, and project specification.[9]
For related preparation, see API 6D ball valve testing requirements and how to prepare a valve inspection and test plan.
A test result may be unreliable when another flow path remains open, pressure or temperature is unstable, the gauge range is too large, the meter cannot measure the expected low flow, gas is trapped in a liquid test, or the ball has not reached its confirmed endpoint.
Measure the Leakage
Useful measurement methods include collected liquid volume, bubble count, a calibrated low-flow meter, mass change, or a controlled pressure-decay test.
Leakage rate = collected volume ÷ test time
| Collected Volume | Test Time | Calculated Leakage |
|---|---|---|
| 5 mL | 10 minutes | 0.5 mL/min |
| 18 mL | 10 minutes | 1.8 mL/min |
| 30 mL | 10 minutes | 3.0 mL/min |
| 120 mL | 10 minutes | 12.0 mL/min |
These figures show how to calculate leakage. They are not pass-or-fail limits.
Example of a complete test record: End A pressurized with water at 8.0 bar, End B connected to a graduated collection vessel, water temperature 22°C, stabilization time 10 minutes, measurement time 10 minutes, collected volume 18 mL, calculated leakage 1.8 mL/min.
“Leaking” or “not tight” is not a complete record. Always include pressure, medium, direction, temperature, test time, and cavity condition.
Pressure-decay tests require stable temperature and a known test volume. Gas cooling, pipe expansion, instrument drift, dissolved gas, and external leakage can change pressure without through-seat leakage.
“Zero leakage” or “bubble-tight” means no leakage above the specified detection or acceptance limit under the stated test conditions. It does not mean that no molecule can pass under every pressure, temperature, or fluid condition.
Where bidirectional sealing is required, test each direction separately. Do not combine both directions into one result. ISO 17292:2015 includes requirements for covered metal ball valves used in petroleum, petrochemical, natural-gas, and related industrial applications.[10]
Read the Damage
Photograph the ball, seats, deposits, springs, rear seals, and coupling before cleaning. The damage pattern often points to the original cause.
| Damage Pattern | Likely Cause |
|---|---|
| One deep radial scratch | Hard debris |
| Several parallel scratches | Abrasive particles |
| Torn soft-seat edge | Debris, over-travel, or poor assembly |
| Seat material pushed into the bore | Heat, pressure, creep, or excessive load |
| Swollen polymer | Chemical incompatibility |
| One-sided sealing band | Misalignment, pipe load, or body distortion |
| Local coating chip | Hard impact or concentrated contact |
| Polished coupling corners | Coupling slip |
| Twisted stem | Excess torque |
| Damaged rear seal | Heat, chemical attack, extrusion, or poor assembly |
| Seat ring stuck in its pocket | Deposits, corrosion, swollen seal, or distortion |
| Bench test passes but installed valve leaks | Pipe load, temperature, or installation distortion |
A damaged seat may be the visible failure, but the original cause may be an early actuator stop, weld debris, excessive actuator torque, incorrect installation direction, unsuitable seat material, or pipe misalignment. Correct the cause before fitting new parts.
Repair or Replace
Repair the actuator system when the limit switch operates early, a stop prevents full travel, the coupling slips, the positioner is incorrectly calibrated, dynamic supply pressure is low, exhaust is restricted, gearbox backlash is excessive, or the actuator is undersized.
After actuator work, verify:
- Full-open and full-closed positions
- Endpoint repeatability
- Limit-switch timing
- Local and remote indication
- Fail action
- Stroke time
- Dynamic supply condition
- Required seat leakage
Repair the valve when correct ball position and sufficient actuator output are confirmed but leakage remains above the required limit.
Valve repair may include cleaning the cavity, replacing seats, seat springs, rear seals, body seals, bearings, stem, or ball, and restoring an approved hard coating. Use traceable parts with the correct material, dimensions, pressure-temperature capability, and chemical compatibility.
Replace the valve when the body is cracked or badly eroded, the stem is permanently twisted, the internal drive cannot be restored, ball coating damage exceeds the approved repair range, matched metal-seat parts are unavailable, materials cannot be verified, or the valve design is unsuitable for the process.
Prevent Repeat Failure
Keep a baseline after commissioning or repair. Comparing a valve with its own earlier readings is usually more useful than comparing it with a different valve.
Illustrative maintenance trend:
| Recorded Item | After Repair | Current Reading | Observed Change |
|---|---|---|---|
| Closing time | 8.0 seconds | 10.4 seconds | 30% longer |
| Dynamic air pressure near closure | 5.8 bar | 4.7 bar | 1.1 bar lower |
| Peak motor current | 2.2 A | 2.9 A | 31.8% higher |
| Measured liquid leakage | 0.4 mL/min | 4.6 mL/min | 4.2 mL/min higher |
These changes do not prove one specific fault, but together they show that actuator supply, valve resistance, and shutoff performance have become worse. The valve should be checked before it loses full travel or exceeds its required leakage limit.
Keep records of:
- Valve model, size, pressure class, seat design, and materials
- Open and closed stem positions
- Limit-switch and stop settings
- Closing time
- Dynamic air or hydraulic pressure
- Motor current or torque indication
- Test medium, pressure, direction, temperature, and leakage rate
- Photographs and replaced-part records
For dirty service, improve pipe cleaning, flushing, filtration, purging, shutdown draining, and closing-speed control. Recheck actuator sizing when pressure, temperature, seat material, fluid viscosity, solids, operating frequency, or minimum energy supply changes.
Conclusion
A Closed signal is not proof of tight shutoff. Confirm real flow, remove bypass and meter errors, identify the valve design, and compare the actuator signal with the actual stem endpoint. Measure actuator pressure, current, or torque while the valve moves—not only while it is idle. A pressure drop from 6.0 to 4.6 bar during closure, a stroke-time increase from 8.0 to 10.6 seconds, or an early endpoint gives useful evidence of an actuator or torque problem. If correct travel is proven but leakage remains, inspect the ball, seats, springs, rear seals, and cavity arrangement. Record leakage as a measured rate, such as 1.8 mL/min at 8.0 bar and 22°C, before deciding to repair or replace the valve.