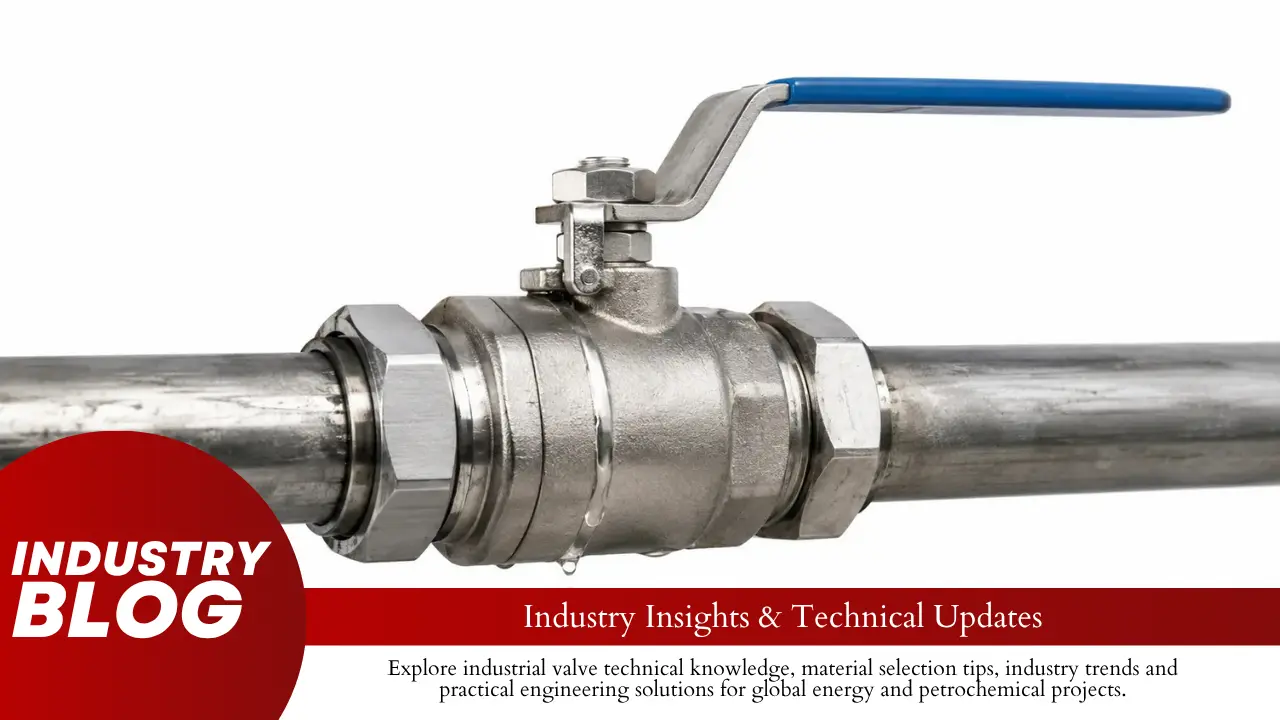
For a basic comparison of full-bore and reduced-bore designs, see this full-bore ball valve guide.

Know the Basic Terms
NPS and DN are nominal size names. They are not exact inside diameters.
OD is the pipe outside diameter. ID is the inside diameter available to the pig.
Pipe Schedule identifies a standard wall-thickness series. For the same NPS, a thicker wall normally gives a smaller ID.
Full bore describes the valve-port design. It does not prove that the valve bore matches the actual pipe ID.
Offset, also called hi-lo at a welded joint, means that the pipe and valve bores do not share the same centerline.
Clock position describes where a feature sits around the bore. Twelve o’clock is the top, six o’clock is the bottom, and three and nine o’clock are the sides.
Start With the Pig
Identify the exact pig before checking the valve. A foam pig, cup pig, disc pig, gauging pig, geometry tool, and intelligent inspection tool can have very different limits.
Ask the pig supplier for:
- Maximum rigid outside diameter
- Minimum permitted clear bore
- Maximum inward step
- Maximum joint offset
- Maximum restriction length
- Minimum bend radius
- Permitted speed range
- Required pressure difference
- Bidirectional capability
Do not rely on a statement such as “the pig can pass a 10% restriction.” Ask what the percentage is based on:
- Tool outside diameter
- Nominal pipe ID
- Measured pipe ID
- Diameter reduction
- Cross-sectional area reduction
Also ask how long the restriction may continue. A 5 mm-long seat edge does not affect a pig in the same way as a 500 mm-long reduced bore.
API Standard 1163 covers the qualification, selection, reporting, verification, validation, and use of in-line inspection systems. It does not provide one universal valve-bore or step limit for every inspection tool.[3]
Check three separate questions:
- Can it pass? The tool must not become stuck or damaged.
- Can it keep moving? The line must provide enough pressure difference to overcome friction and restrictions.
- Can it inspect correctly? Sensors, wheels, magnets, or ultrasonic probes must remain in a usable position.
A tool can pass through a valve but still produce poor data if it moves too fast, loses wall contact, or becomes unstable inside the body cavity.
Compare Pig and Bore Size
Use the smallest opening in the complete installed path:
Available Bore ≥ Pig Supplier’s Minimum Bore
The smallest opening may be at the:
- Pipe
- Valve end
- Seat ring
- Seat retainer
- Ball port
- Weld root
- Flange gasket
- Internal lining
Suppose the smallest finished valve opening is 197.6 mm and the pig requires 193.0 mm:
Diametral Margin = 197.6 - 193.0 = 4.6 mm
If the pig and bore are perfectly centered:
Radial Margin = 4.6 ÷ 2 = 2.3 mm per side
The 4.6 mm value is the total diameter difference. It does not mean there is 4.6 mm of space on each side.
For rigid circular tool modules, the minimum clear circle controls passage. Flexible foam, cups, and discs may deform through a smaller or oval opening, but the rigid shaft, body, magnets, electronics, or wheels must still fit.
Check the Pipe Schedule
For plain, unlined pipe:
Pipe ID = OD - 2 × Wall Thickness
ASME B36.10 standardizes dimensions for welded and seamless wrought steel pipe.[4] ASME B36.19 covers welded and seamless wrought stainless steel pipe.[5]
The following rounded nominal values show how much Schedule can change the bore:
| Pipe Size | Schedule 40 ID | Schedule 80 ID | ID Difference |
|---|---|---|---|
| NPS 4 | About 102.3 mm | About 97.2 mm | About 5.1 mm |
| NPS 6 | About 154.1 mm | About 146.4 mm | About 7.7 mm |
| NPS 8 | About 202.7 mm | About 193.7 mm | About 9.0 mm |
| NPS 12 | About 303.3 mm | About 288.9 mm | About 14.4 mm |
An NPS 8 valve with a 198.0 mm finished bore creates different conditions depending on the adjoining pipe:
- Schedule 40 pipe ID is about 202.7 mm, so the valve creates a reduction.
- Schedule 60 pipe ID is about 198.5 mm, so the difference is small.
- Schedule 80 pipe ID is about 193.7 mm, so the valve bore is larger than the pipe bore.
The NPS 8 Schedule 40-to-valve change is:
Diameter Reduction = 202.7 - 198.0 = 4.7 mm
Radial Step = 4.7 ÷ 2 = 2.35 mm
The diameter decreases by about 2.3%, but the flow area decreases by about 4.6%:
Area Reduction = 1 - (198.0 ÷ 202.7)2 ≈ 4.6%
Area reduction helps explain the change in flow path, but it does not replace the pig supplier’s mechanical passage limits.
Record the pipe data separately on both sides of the valve:
| Item | Upstream | Downstream |
|---|---|---|
| Pipe OD | ||
| Schedule or specified wall | ||
| Measured wall | ||
| Calculated nominal ID | ||
| Measured end ID | ||
| Lining thickness | ||
| Internal seam height | ||
| Ovality |
Do not assume that both sides are identical. A mainline valve may connect standard-wall pipe to a heavy-wall station spool, launcher connection, forged pup, or replacement section.
Include Linings and Deposits
For a uniformly lined pipe:
Finished ID = OD - 2 × Wall Thickness - 2 × Lining Thickness
A lining occupies space on both sides of the diameter:
| Lining Thickness per Side | Total Bore Reduction |
|---|---|
| 0.5 mm | 1.0 mm |
| 1.0 mm | 2.0 mm |
| 1.5 mm | 3.0 mm |
| 3.0 mm | 6.0 mm |
For example, a 500 mm machined valve bore with a uniform 1.5 mm overlay becomes:
Finished ID = 500 - 2 × 1.5 = 497 mm
If the pig requires a 499 mm opening, the valve fails after the overlay is applied.
Use the maximum finished thickness, not only the average coating target. Runs, overlaps, and repair patches can create smaller local openings.
For an operating pipeline, also check:
- Wax
- Scale
- Black powder
- Sand
- Loose lining
- Dents
- Buckles
- Pipe ovality
Metal loss may enlarge the metal ID, but deposits and corrosion products can reduce the clear opening.
Measure the Complete Valve Bore
Request a sectional drawing through the valve centerline. A general arrangement drawing usually does not show the complete pig path.
| Location | Required Check |
|---|---|
| Upstream valve end | Minimum finished ID |
| Upstream seat | Seat-ring and retainer opening |
| Ball entrance | Opening and edge shape |
| Ball center | Minimum ball-port ID |
| Ball exit | Opening and edge shape |
| Downstream seat | Seat-ring and retainer opening |
| Downstream valve end | Minimum finished ID |
The seat or seat retainer may be smaller than the ball port. Do not approve the valve from the ball-port dimension alone.
Use finished dimensions after accounting for:
- Internal coating
- Corrosion-resistant overlay
- Seat hardfacing
- Repair welds
- Final machining tolerances
Measure the bore in at least two directions. When the clearance is small, measure several clock positions or scan the complete internal profile.
Also record the axial length of the minimum opening. Consider a pig with three sealing discs spaced 250 mm apart:
- A 50 mm-long restriction may load only one disc at a time.
- A 500 mm-long restriction may load all three discs at the same time.
The second condition can create much more friction even when the minimum diameter is unchanged.
For further information on full-bore, reduced-bore, body construction, and seat options, see this API 6D forged ball valve guide.
Check Directional Bore Steps
A bore change must be checked in the actual pig-travel direction.
When the pig moves from a larger bore into a smaller bore:
Inward Step = max(0, (Upstream ID - Downstream ID) ÷ 2)
For a 202 mm pipe entering a 198 mm valve:
Inward Step = (202 - 198) ÷ 2 = 2 mm
The pig meets a 2 mm radial shoulder if the two parts are perfectly centered.
When the pig moves from a smaller bore into a larger bore, there is no concentric inward shoulder in that direction. However, the larger opening may cause:
- Temporary loss of cup or disc sealing
- Fluid bypass
- Loss of wheel or sensor support
- A sudden speed change
A larger downstream bore does not guarantee a clear joint. Offset, weld projection, coating, or pipe ovality can still create a one-sided obstruction.
For early screening:
Screening Intrusion = Inward Step + Offset + Weld Projection
Use this addition only when the features occur on the same side and at nearly the same axial position.
For example:
- Concentric inward step: 1.75 mm
- Centerline offset: 1.20 mm
- Weld projection at the same side: 0.70 mm
Screening Intrusion = 1.75 + 1.20 + 0.70 = 3.65 mm
If the offset is at 12 o’clock and the weld projection is at 6 o’clock, they are separate features. Do not report their sum as one measured obstruction.
A rounded 2 mm step is less severe than a sharp 2 mm shoulder. Record the height, clock position, axial position, edge shape, and measurement uncertainty.
Check the Transition Length
A transition is controlled by the diameter change, axial length, angle, alignment, and edge shape.
The taper half-angle measured from the pipe centerline is:
α = arctan((Large ID - Small ID) ÷ (2 × Taper Length))
The full included angle is 2α. Drawings should state which angle is being used.
For a reduction from 204 mm to 198 mm, the radial change is 3 mm:
| Taper Length | Approximate Half-Angle |
|---|---|
| 30 mm | 5.7° |
| 10 mm | 16.7° |
| 5 mm | 31.0° |
All three transitions end at 198 mm, but the 5 mm transition loads cups, discs, wheels, and sensors much more sharply than the 30 mm transition.
Inspect both ends of the taper. A machined transition can still contain:
- A sharp shoulder
- A burr
- A coating ridge
- Deep machining marks
- An off-center profile
There is no single taper angle that is safe for every pig. Send the actual profile and transition length to the tool supplier.
Check Welded and Flanged Connections
ASME B16.25 covers butt-welding-end preparation, including bevels, internal shaping of heavy-wall components, and preparation of internal ends. It does not confirm that the completed field weld is piggable.[6]
Before welding, measure:
- Pipe-end ID
- Valve-end ID
- Internal offset
- Root gap
- Pipe ovality
- Internal taper
After welding, check for:
- Excess root penetration
- Root sag
- Internal undercut
- Repair buildup
- Spatter
- Backing-material intrusion
A weld can pass a pressure test and still damage a pig. Pressure containment and clear passage are different checks.
Radiography and ultrasonic testing examine weld quality, but they may not show the full internal shape. A borescope, profile gauge, mandrel, or three-dimensional scan may still be required.
For a flanged valve, check:
- Valve-flange bore
- Mating-flange bore
- Gasket inside diameter
- Gasket centering
- Flange alignment
- Pipe-to-flange transition
For example, if the valve and flange bores are both 200 mm but a 196 mm gasket is installed, the gasket creates a 2 mm radial intrusion:
Gasket Intrusion = (200 - 196) ÷ 2 = 2 mm
A correctly sized gasket can also extend into the bore when installed off-center.
See flanged versus welded-end ball valves and this valve end-connection guide for more information about installation differences.
Verify the Full-Open Position
The ball port must align with the seats and valve ends when the valve is fully open.
A valve may stop short because of:
- Incorrect mechanical-stop adjustment
- Gearbox backlash
- Stem or coupling play
- Incorrect limit-switch setting
- Low pneumatic or hydraulic pressure
- Seat friction
- Debris around the ball or seats
Do not rely only on an OPEN signal. A switch may change state before the ball reaches full alignment.
Check the complete valve-and-actuator assembly with a bore gauge, camera, scanner, mandrel, or representative dummy tool.
Confirm that the actuator can reach the same position at:
- Minimum specified air or hydraulic supply pressure
- Maximum expected differential pressure
- Lowest expected operating temperature
- Maximum stated valve torque
Repeat the check after work on the actuator, gearbox, stem, ball, or seats. This valve torque guide explains the difference between break torque, running torque, and actuator margin.
Check Cavity Bypass
The pressure behind the pig must be higher than the pressure in front of it.
The theoretical pushing force is:
Drive Force ≈ Pressure Difference × Effective Pig Area
For a pig with an effective diameter of 200 mm:
Area = π × 0.22 ÷ 4 ≈ 0.0314 m²
| Pressure Difference | Theoretical Drive Force |
|---|---|
| 20 kPa | About 0.63 kN |
| 50 kPa | About 1.57 kN |
| 100 kPa | About 3.14 kN |
These are theoretical values before deducting:
- Cup or disc friction
- Restriction resistance
- Pipeline slope
- Debris load
- Fluid leakage around the pig
A short pig may lose both sealing elements inside a large valve cavity. Fluid then flows around the pig instead of pushing it forward.
Compare the seat-to-seat distance with the cup or disc spacing. Excessive bypass can make the pig slow or stop. Pressure may then build behind it and cause sudden acceleration when sealing returns. This is more serious in gas service because gas is compressible.
Check Nearby Fittings
Confirming the valve does not prove that the complete route is piggable.
Also check:
- Nearby bends
- Reducers
- Tees and branch openings
- Check valves
- Insulating joints
- Flow meters
- Launcher and receiver necks
- Repair sleeves
Distance between features matters. A 3 m-long inspection tool may enter a bend while its rear modules are still passing through the valve. Ask the tool supplier for the minimum straight length needed between restrictions and bends.
In the United States, 49 CFR 192.150 generally requires covered new gas transmission lines and covered replacement pipe, valves, fittings, and other components to accommodate instrumented internal inspection devices, subject to listed exceptions.[7] Similar design requirements apply to covered hazardous-liquid pipelines under 49 CFR 195.120.[8]
Test the Finished Assembly
A hydrostatic test checks pressure containment. It does not prove clear passage.
The finished dimensional report should include:
- Valve serial number
- Drawing revision
- Valve-end, seat, and ball-port IDs
- Coating or overlay thickness
- Measurement direction and clock position
- Instrument identification
- Calibration status
- Measurement uncertainty
A rigid mandrel can confirm a minimum opening. A short plate checks local diameter, while a longer mandrel is better for finding alignment changes.
A dummy tool gives stronger evidence when it copies the real tool’s:
- Rigid body diameter
- Guide-disc diameter
- Module spacing
- Joint movement
- Sensor envelope
- Overall length
Record the force required to move the mandrel or dummy through the valve. A sudden increase may show a seat edge, offset, coating buildup, or partly open ball.
Shop pull force is supporting evidence. It is not a replacement for a field movement calculation because temperature, lubrication, pressure, speed, magnetic load, and debris are different.
No dimensional measurement is exact. NIST explains that measurement uncertainty gives reasonable bounds around a reported result rather than treating the measured number as an exact value.[9]
Use Measurement Margin
Suppose the pig supplier allows a maximum local inward intrusion of 4.0 mm.
The measured obstruction is 3.65 mm:
Nominal Margin = 4.00 - 3.65 = 0.35 mm
If the combined measurement uncertainty is ±0.50 mm:
Possible Maximum = 3.65 + 0.50 = 4.15 mm
| Item | Value |
|---|---|
| Supplier limit | 4.00 mm |
| Measured obstruction | 3.65 mm |
| Nominal remaining margin | 0.35 mm |
| Measurement uncertainty | ±0.50 mm |
| Possible upper result | 4.15 mm |
The uncertainty is larger than the remaining margin. The joint should not receive an unconditional pass.
Possible actions include:
- Use a more accurate measurement method
- Reduce the weld projection
- Improve joint alignment
- Install a longer transition
- Obtain written approval from the pig supplier
Worked Piggability Check
The following values are hypothetical. They show the calculation method and are not universal API or ASME acceptance limits.
| Item | Value |
|---|---|
| Pig minimum clear passage | 193.0 mm |
| Maximum local inward intrusion | 4.0 mm |
| Required transition length | 25 mm |
| Upstream finished pipe ID | 201.5 mm |
| Downstream finished pipe ID | 199.8 mm |
| Finished valve-end ID | 198.0 mm |
| Ball-port ID | 198.5 mm |
| Seat-bore ID | 197.6 mm |
The smallest valve opening is 197.6 mm:
Diametral Margin = 197.6 - 193.0 = 4.6 mm
Concentric Radial Margin = 4.6 ÷ 2 = 2.3 mm per side
The basic bore check passes.
At the upstream joint:
Inward Step = (201.5 - 198.0) ÷ 2 = 1.75 mm
Assume a 1.2 mm offset and a 0.7 mm weld projection occur on the same side:
Screening Intrusion = 1.75 + 1.20 + 0.70 = 3.65 mm
With ±0.50 mm measurement uncertainty, the possible upper result is 4.15 mm. This exceeds the 4.0 mm supplier limit, so the joint does not receive an unconditional pass.
At the downstream joint, the pig moves from a 198.0 mm valve end into a 199.8 mm pipe. There is no concentric inward step in that direction. Offset, weld projection, coating, and ovality must still be checked.
The upstream bore reduces from 201.5 mm to 198.0 mm over 12 mm:
α = arctan((201.5 - 198.0) ÷ (2 × 12)) ≈ 8.3°
The example supplier requires a 25 mm transition length. The assembly therefore fails the transition requirement even though the minimum valve bore is large enough.
Possible corrections include a longer transition pup, better alignment, approved weld finishing, a different valve-end profile, or a pig approved for the measured geometry.
Do not grind or modify a pressure-containing valve part without approval from the valve manufacturer and project engineer.
Write Measurable Purchase Requirements
Do not write only “full-bore piggable ball valve.” Put measurable limits in the order.
- Pipe OD and wall thickness on both sides
- Minimum finished valve-end ID
- Minimum seat and ball-port ID
- Maximum inward step and offset
- Maximum weld or gasket intrusion
- Required transition length and edge shape
- Coating and overlay thickness
- Exact pig model or approved tool dimensions
- Required travel direction
- Mandrel or dummy-tool test method
- Actuator full-open verification
- Required measurement uncertainty
For pressure class, body material, end connection, and ordering data, see this API 6D ball valve specification guide. A valve inspection and test plan can also define the drawing review, bore measurement, actuator check, and passage-test witness points; see this valve ITP guide.
The finished valve shall provide a clear and continuous bore in the fully open position. The minimum finished bore, including seats, coatings, overlays, and manufacturing tolerances, shall not be less than ___ mm. The maximum local inward obstruction shall not exceed ___ mm. The transition length shall not be less than ___ mm. The complete valve and supplied actuator shall be tested with the approved mandrel or representative dummy tool in the required direction or directions.
Make the Final Decision
Pass: The finished route meets the pig’s bore, step, transition, movement, and operating limits with enough measurement margin.
Conditional pass: Approval applies only to a named pig, one direction, or stated pressure, speed, and temperature conditions.
Modification required: The bore, transition, weld, gasket, alignment, or ball position must be corrected.
Insufficient data: Finished dimensions, pig limits, installation measurements, or test records are missing.
Conclusion
A full-bore label is not enough to prove piggability. Compare the smallest finished valve opening with the exact pig limit, then check pipe Schedule, seat ID, directional steps, weld or gasket intrusion, transition length, and ball alignment. In the example, a 197.6 mm valve bore passed a 193.0 mm minimum, leaving 4.6 mm diametral clearance. However, a 3.65 mm local obstruction could reach 4.15 mm after measurement uncertainty, and a 12 mm transition failed the supplier’s 25 mm requirement. Final approval should use measured dimensions, a controlled passage test, and written acceptance for the selected pig.